Eagles to Glory has quickly become one of the hottest new rules set names in Napoleonic wargaming. First launched on Amazon earlier this year and now available on Wargame Vault, the ruleset has sparked a wave of discussion and drawn an enthusiastic community—led by its creators, Tim Harwood and Chris Wilkowski, on their bustling Facebook page.
I decided to put these “Grand Tactical” rules to the test with a sprawling fictional engagement—two corps per side fighting across six or seven miles of terrain. Thanks to solo play on Tabletop Simulator, I had the freedom to stretch the system over several days without worrying about space, logistics, or even the family cat toppling my miniatures.
What follows is my Eagles to Glory After Action Report—a look at how Eagles to Glory handles the clash of armies on a truly epic scale.
The Scenario – “Race for the Bridges”
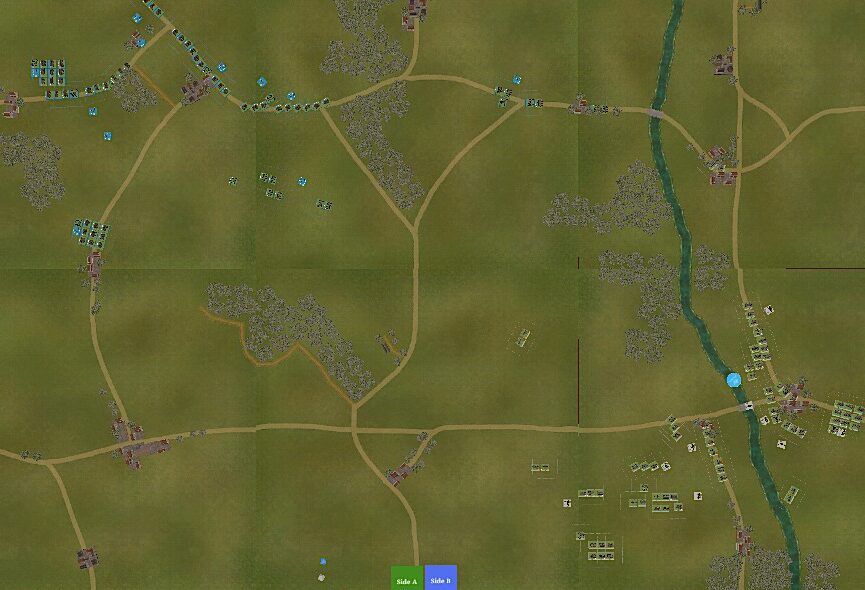
For this test, I designed a fictional scenario in which two Austrian corps were tasked with defending a river crossing against an advance by two French corps. To add an extra layer of uncertainty, I introduced a special rule: either side could “discover” up to three hidden fords in addition to the two established bridge crossings. (You can check out my Hidden Fords rules here.)
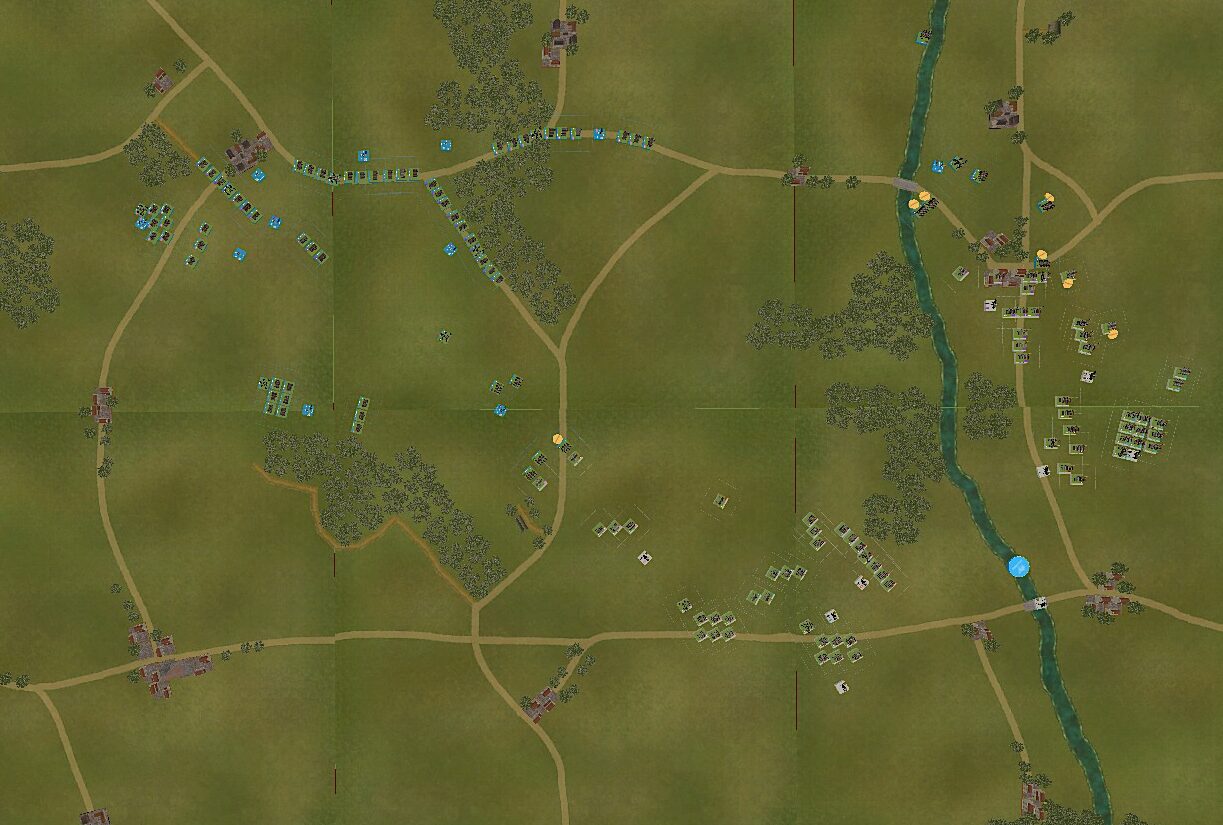
Because the opposing forces began several miles apart, the opening four to five turns were dominated by activations and long marches toward the river. For the French arriving from the Northwest, speed was everything—their best chance lay in seizing a bridgehead before the Austrians could lock down the crossings.
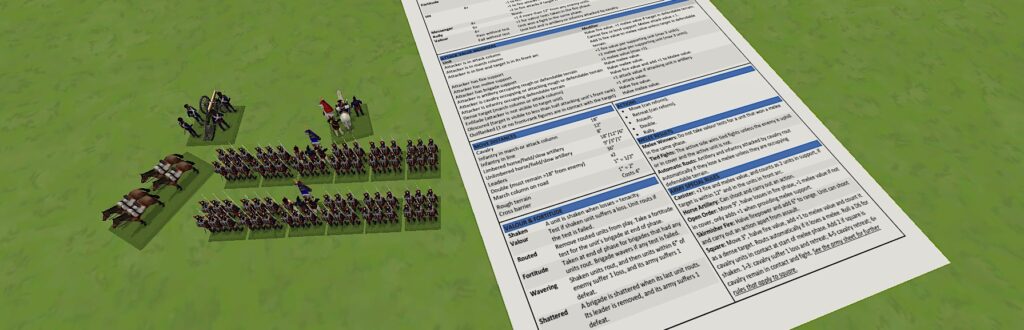
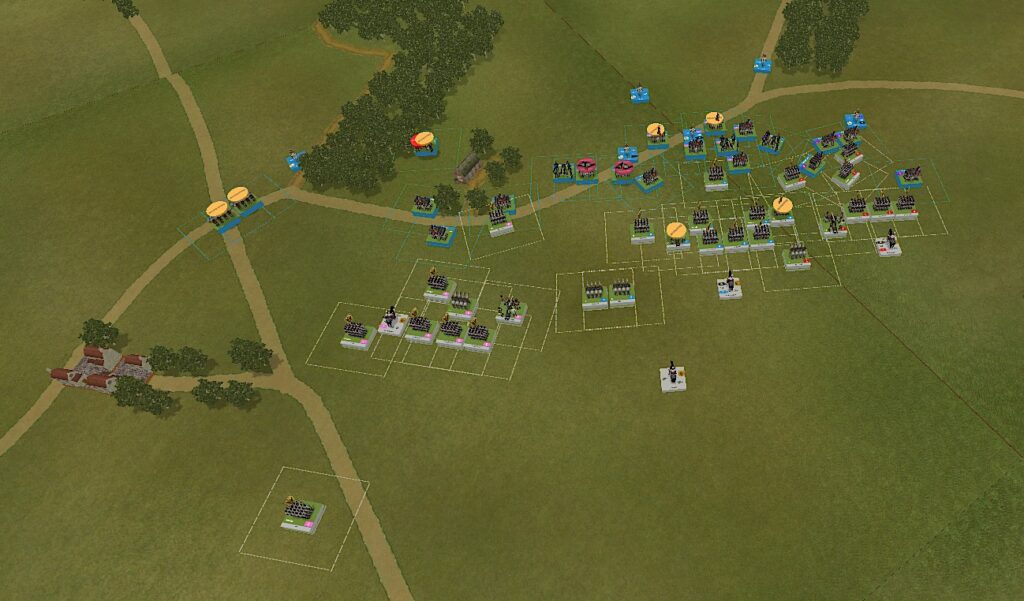
Note: my TTS unit stands shown in these images are displaying the 1″ ZOC.
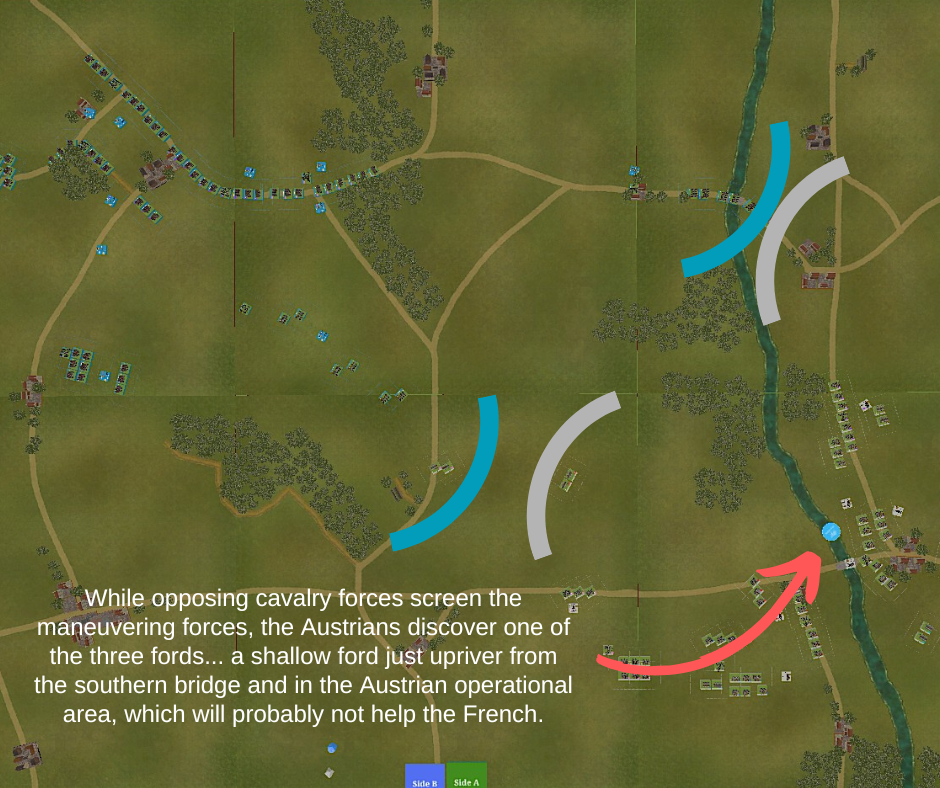
By the fourth turn, the cavalry screens finally clashed in a series of sharp skirmishes. Although the Austrians managed to uncover the first of the hidden fords, the French left-wing French cavalry division forced its way across the northern bridge and secured a tenuous bridgehead. Meanwhile, the bulk of both armies pressed steadily forward along the road network, closing the distance for the larger fight to come.
The Opening ‘Chess Moves’
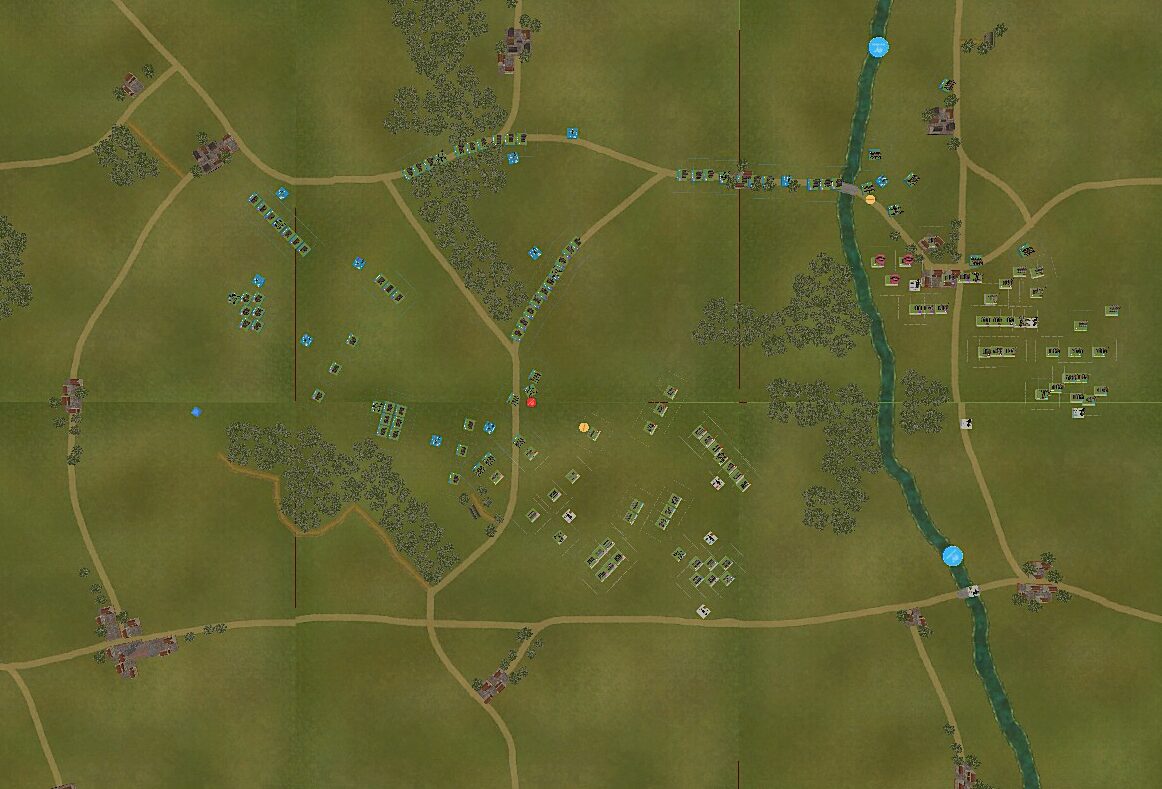
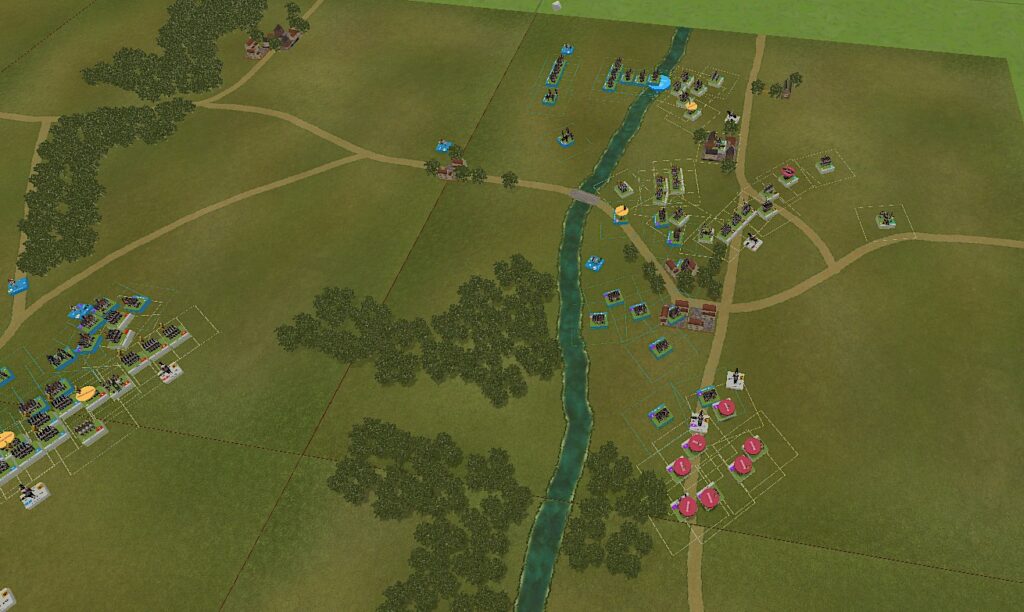
By mid-morning (Turn 7), the Austrians began to form around the village east of the northern bridge, setting up a defensive stance. If they can get organized, they might be able to push the French cavalry back across the river before the rest of the French corps arrives.

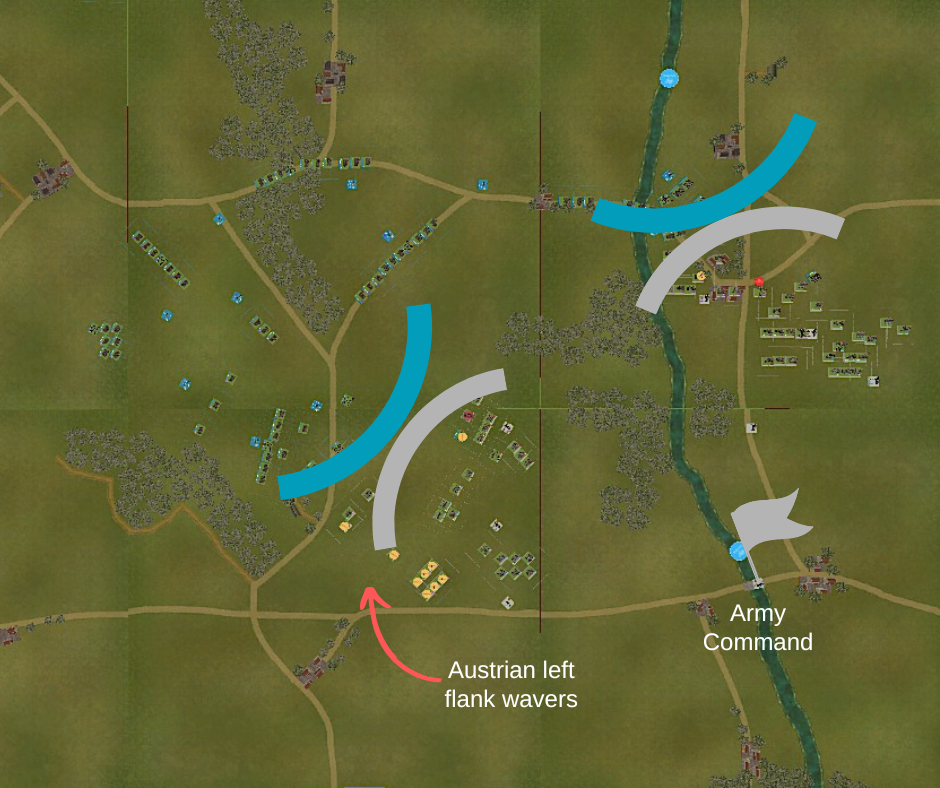
Meanwhile, the Austrian left flank attempted to threaten the French line of attack. The Austrian’s shorter Command and Control distances kept them from extending too far as the Army commander, located at the southern bridge, is trying to stay in touch with both of his wings.
Within the next two turns, the French have located a second ford to the north of the bridge, which can help them to cross the river. Additionally, the first of the French infantry divisions approached the bridge, putting more pressure on the Austrian right to consolidate their position. Austrian infantry between the river and the village have formed square to thwart the French cavalry’s advance.
The French right wing corps moved slowly over the open ground, causing it to take longer than expected to close with the enemy.
The Lines Form
By Turn 10, the lines were forming for battle.


Under the Noon Day Sun
By late morning (Turn 14), the Austrian III Corps on the left flank had stiffened, locking horns with the French I Corps in a grinding contest of will. Losses mounted on both sides, the fields were becoming littered with shattered formations and weary men.
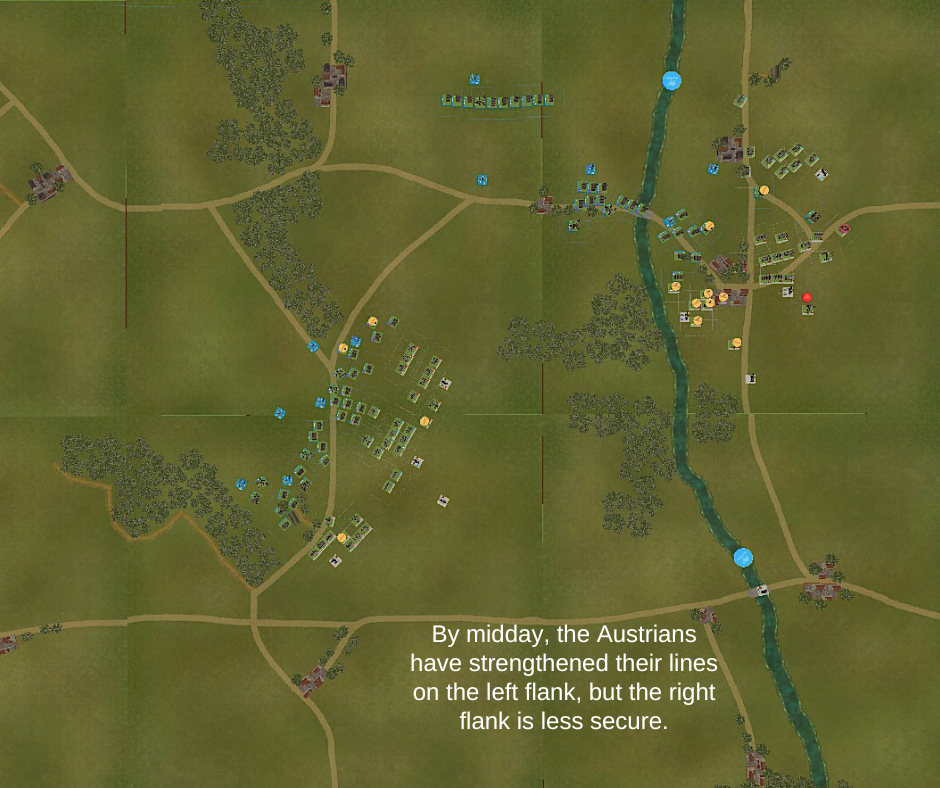
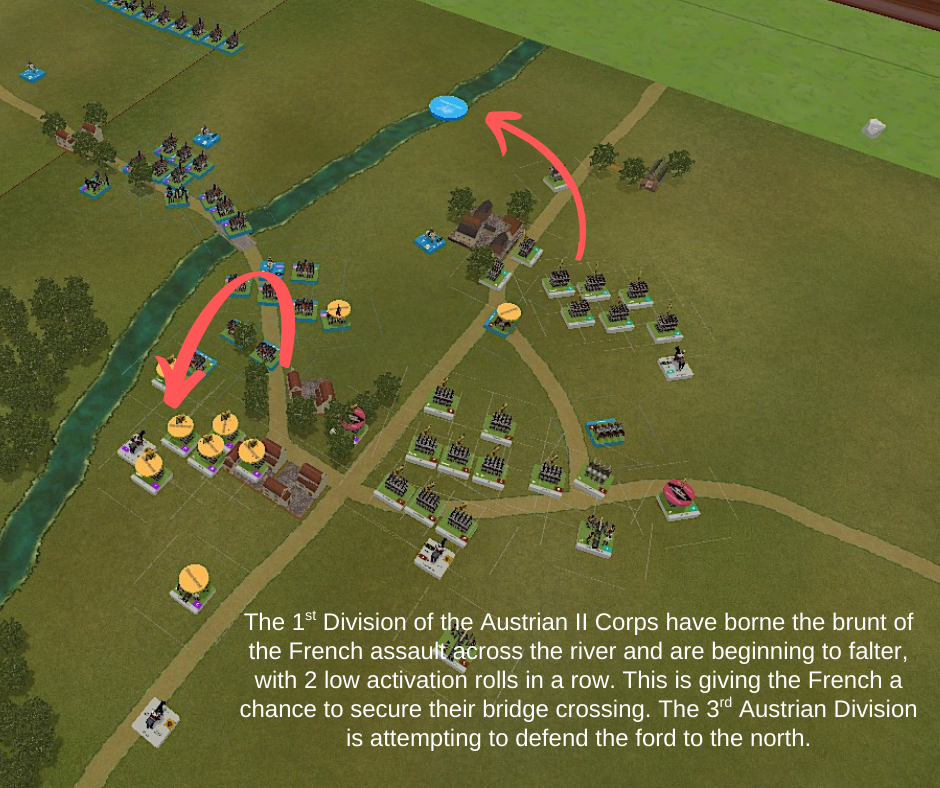
Meanwhile, on the Austrian right flank, the 1st Division of Austrian II Corps had been bearing the brunt of the struggle at the northern bridge for hours. Alone, they had held with grim determination, pushing the French back against the very timbers of the bridge and the riverbank itself. Yet their valor could not defy exhaustion forever. After a string of punishing activation rolls, their cohesion faltered, and the line began to fall back in disorder. The French seized the moment, expanding their precarious foothold on the eastern bank.
As the remaining two Austrian divisions of the II Corps entered the fray on the right, they rushed to contain the danger, driving toward the shallow ford north of the bridge. There, only a battered French cavalry division stood in defense—its ranks thinned and wavering. Should Austrian troops secure the ford before fresh French units could reinforce, the French bridgehead itself might collapse.
The contest raged beneath the searing Bavarian sun, the shimmer of heat on steel only sharpening the sense that the balance of the battle now hung by the thinnest thread.
The ‘Coup de Grace’
By the mid-afternoon, the engaged divisions on both sides were running out of steam (and Divisional Points) to keep the fight up much longer. As losses mounted, and the DPs dropped, more bad activations occurred, with both forces swaying back and forth in front of the northern bridge.
In one final effort, the French pushed the Austrians away from the northern bridge after the battered 1st Austrian Division routed due to a very unfortunate activation roll. Unfortunately, the other divisions of the French Corps were not able to press the advantage, and the Austrians were able to close the trap. They regained the bridge and blocked the northern ford, leaving the single French division on the eastern side of the river cut off. Their demise was imminent.
With that last affront, the French had to abandon the battlefield to the bruised yet unbeaten Austrian troops.
Besides not capturing either bridge, the French unit losses during the battle was significantly higher than the Austrians:
- 1,500 unit points lost by the French
- 780 unit points lost by the Austrian
This defeat by the French will certainly have a negative impact on their overall campaign.
Take Aways from this Eagles to Glory After Action Report
Even though I have reviewed this rules set previously, I found several factors that stood out to me as this scenario unfolded that I would like to touch on:
- The Divisional Points are a great way of incorporating factors like fatigue and attrition into the game. Some games allow units to fight forever, but not Eagles to Glory. Your forces will wear down if you keep them moving. And when they start to take losses, that attrition will play heavily in future behavior.
- The Road network is not a given advantage. Even though an activated unit(s) gains an advantage in the activation roll for traveling along a road, it is not guaranteed to be a ‘full’ or ‘double’ move – as in other rules sets. If the activation roll is low, units moving along roads may still move, but at a half-move pace. (Without the road, they may not move at all.) I expected the road network to bring these combatants into contact a lot quicker than they did. I was wrong.
- Cavalry are expensive and fragile. Cavalry are great at keeping advancing infantry at bay, but actually using them can be costly, as the French learned in this scenario. The absolutely best way to use them is in ‘charge’/’countercharge’ actions, where they gain a +6 in combat resolution rolls. It may be a while before I actually learn how to use them to my best advantage. In the meantime, I will tend to use them as flankers and exploiters of breakthroughs, primarily.
- Reserves are critical. Maneuvering and fighting with all your forces in Eagles to Glory can be an exciting thing to do. But, as I experienced in this scenario, once they are all exhausted, there are no forces to perform that ‘coup de grace’. In this scenario, the Austrian forces got a couple of lucky rolls at the end to finish the French… but, there was no certainty. Probably a third of your forces should be held stationary and out of combat range for the first portion of the battle. And the DP system of Eagles to Glory will do a great job of rewarding you for that decision. Because once your divisions’ DP points fall below 20, you start to see some bad results in your activation rolls.
Conclusion
In closing, I hoped you enjoyed this Eagles to Glory After Action Report and review. I am still learning the rules and I stay active on the Facebook page to get further info from the rules authors. I encourage you to check out this rules set, if you haven’t already – and join their Facebook page community.
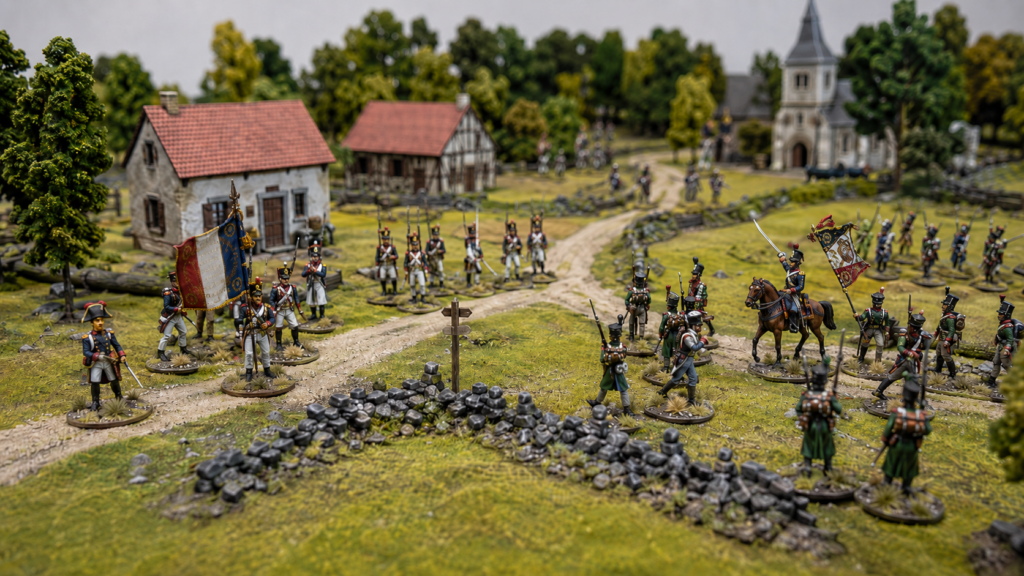
Article image: ChatGPT, Tabletop Photos by author